manual for intex pool

Intex Pool Manual: A Comprehensive Guide
This comprehensive guide details the setup, maintenance, and troubleshooting of your Intex pool, ensuring a safe and enjoyable swimming experience.
Following the instruction manual is crucial for proper assembly, optimal performance, and preventing potential hazards during the entire pool lifecycle.
Adult assembly is required for all components, and securing access points is vital to prevent unsupervised entry, especially for children and pets.
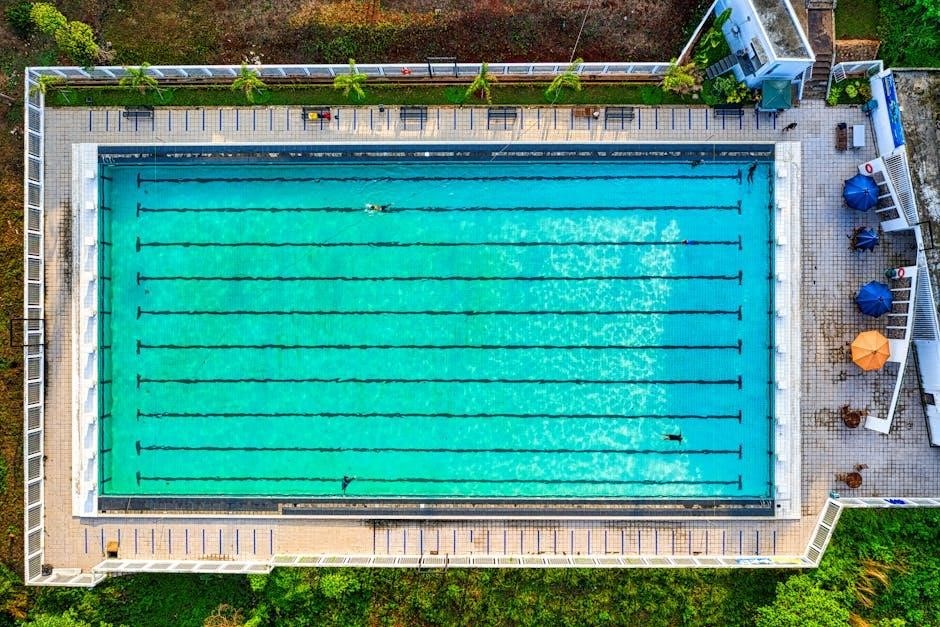
Intex pools offer an accessible and affordable entry point into backyard recreation, providing a fantastic alternative to traditional in-ground installations. These pools come in a variety of shapes and sizes, from the easily portable Easy Set pools to larger, more robust Ultra XTR Frame pools, catering to diverse needs and space constraints.
Understanding the core benefits of an Intex pool – ease of setup, cost-effectiveness, and portability – is key to maximizing your enjoyment. However, proper installation and diligent maintenance, as outlined in this manual, are paramount for safety and longevity.
This guide serves as a comprehensive resource, walking you through each stage of ownership, from initial site selection and setup to ongoing care and winterization. Remember, adhering to the manufacturer’s instructions, found within your specific pool’s manual, is always recommended. Prioritizing safety, particularly regarding access control and unsupervised entry, is non-negotiable when enjoying your Intex pool.
Understanding Your Intex Pool Model
Each Intex pool model possesses unique characteristics, influencing setup procedures and maintenance requirements. Identifying your specific model – whether it’s an Easy Set, Metal Frame, or Ultra XTR Frame pool – is the crucial first step. Refer to the packaging or the pool itself for the model number and dimensions.
The included manual, tailored to your exact model, provides detailed diagrams and step-by-step instructions. Familiarize yourself with all components, including the frame, liner, filter pump, and any included accessories like maintenance kits. Understanding the function of each part ensures correct assembly and efficient operation.
Pay close attention to weight capacities and recommended water levels specified for your model. Overfilling or exceeding weight limits can compromise structural integrity and pose safety risks. Properly identifying your pool model and diligently following its specific manual will guarantee a safe and enjoyable experience.
Safety First: Important Warnings and Precautions
Prioritizing safety around your Intex pool is paramount. Never dive, jump, or slide into the pool, as these actions can lead to serious injury, especially in above-ground models or shallow water. Constant, competent adult supervision is absolutely essential whenever the pool is in use, particularly with children and pets present.
Install a robust safety barrier – a fence, gate, or other enclosure – to prevent unauthorized access. Ensure all doors and windows leading to the pool area are secured and equipped with self-closing and self-latching mechanisms. Regularly inspect the pool area for potential hazards, such as slippery surfaces or damaged equipment.
Pool and accessories assembly must be performed exclusively by adults. Familiarize yourself with emergency procedures, including CPR, and keep rescue equipment readily available. Ignoring these precautions can result in severe accidents; vigilance is key.

Pool Setup: Step-by-Step Instructions
Carefully follow these instructions for site selection, ground preparation, frame assembly, and liner installation to ensure a structurally sound and enjoyable pool experience.
Proper setup is vital!
Site Selection and Ground Preparation
Choosing the right location is paramount for a successful Intex pool installation. The pool location must allow for securing all doors, windows, and safety barriers, preventing unauthorized access. Ensure the chosen site is level and free from rocks, roots, or other debris that could damage the pool liner.
Consider proximity to electrical outlets for the filter pump and other accessories, but maintain a safe distance to avoid electrical hazards. Avoid placing the pool under trees, as falling leaves and branches can contaminate the water and damage the liner.

Ground preparation is critical; clearing the area and removing any sharp objects is essential. Some installers recommend digging down to create a level surface, while others build a sandbox-like structure to overcome minor elevation changes – a method proven effective over three years.
Leveling the Ground for Your Pool
Achieving a perfectly level surface is arguably the most crucial step in Intex pool setup. Even a slight incline can cause uneven water distribution, putting stress on the frame and liner, potentially leading to damage or collapse. Thoroughly assess the chosen site for any significant slopes or dips.
Methods for leveling vary; Digging down is a common approach, removing high spots to create a uniformly flat base. Alternatively, building up low areas with sand can be effective, as demonstrated by a successful three-year installation using this method to overcome an 8-inch elevation drop.
Use a long level and straight edge to check for levelness in multiple directions. Compacting the soil or sand base is vital to prevent settling. Remember, a level pool ensures structural integrity and maximizes the lifespan of your Intex investment.
Assembling the Pool Frame
Carefully unpack all frame components and verify that all parts listed in the manual are present. Begin by laying out the base rails, connecting them securely according to the diagram provided in your specific Intex pool model’s instructions. Ensure all connections are firmly snapped or bolted together – this is foundational for stability.
Next, assemble the uprights and corner connectors. These provide the vertical support for the pool walls. Attach the uprights to the base rails, ensuring they are properly aligned and secured. The corner connectors join the rails at the corners, completing the rectangular frame structure.
Double-check all connections before proceeding. A wobbly or improperly assembled frame can compromise the pool’s integrity. Refer to the manual frequently during this process, as specific assembly sequences vary between Intex pool models.
Installing the Pool Liner
Carefully unfold the pool liner and spread it out over the assembled frame, ensuring it’s centered. Avoid dragging the liner across rough surfaces to prevent punctures or tears. Gently position the liner so it conforms to the shape of the frame, allowing it to drape naturally.
Begin smoothing out wrinkles, working from the center outwards. Use your hands to gently push out any air pockets and ensure the liner is evenly distributed. Avoid pulling or stretching the liner excessively, as this could damage the material.
Attach the liner to the top rail using the provided clips or fasteners. Ensure a secure fit around the entire perimeter of the pool. Regularly check for wrinkles or unevenness as you proceed, making adjustments as needed. A properly installed liner is crucial for preventing leaks and maintaining water clarity.

Water Filling and Initial Setup
Begin filling the pool with water, carefully monitoring the liner’s placement. Simultaneously, set up the filter pump and prepare for initial water chemistry balancing for optimal results.
Filling the Pool with Water
Carefully begin filling your Intex pool with water, constantly observing the pool liner as it expands and settles into place. This is a critical step to ensure a smooth and wrinkle-free liner installation. Avoid overstretching the liner during this process; gentle adjustments can be made as the water level rises.
Ensure the ground remains level throughout the filling process. Minor adjustments can still be made if needed, but significant leveling issues should be addressed before proceeding further. A garden hose with a diffuser is recommended to prevent damage to the liner from high-pressure water flow.
As the water level increases, periodically check for any potential leaks or areas of concern around the pool frame and connections. Addressing these issues early on will save you time and effort later. Continue filling until the desired water level is reached, typically a few inches below the skimmer opening.
Setting Up the Filter Pump and System
Once the pool is filled, it’s time to set up the filter pump system, essential for maintaining clean and healthy water. Carefully connect the hoses to the filter pump inlet and outlet, ensuring a secure and watertight fit. Prime the pump according to the manufacturer’s instructions – this usually involves filling the pump housing with water to initiate suction.
Position the filter pump on a level surface near an electrical outlet, protected from direct sunlight and rain. Never operate the pump if it’s damaged or if the electrical cord is frayed. Connect the hoses to the pool’s inlet and outlet fittings, verifying proper alignment.
Plug in the pump and allow it to run for at least 24 hours to circulate and filter the water. Regularly inspect the filter for debris and clean or replace it as needed, following the maintenance schedule outlined in your Intex pool manual.
Initial Water Chemistry Balancing
After filling your Intex pool, balancing the water chemistry is paramount for swimmer comfort and equipment longevity. Begin by testing the water using a reliable test kit, checking pH, alkalinity, and chlorine levels. Ideal pH should be between 7.2 and 7.8, while alkalinity should range from 80 to 120 ppm.
Adjust alkalinity first, as it impacts pH stability. Use alkalinity increaser or decreaser as needed, following product instructions carefully. Once alkalinity is balanced, adjust pH using pH increaser or decreaser. Finally, sanitize the water with chlorine, aiming for 1-3 ppm.
Regularly monitor and adjust these levels to maintain optimal water quality. Consistent chemical balance prevents algae growth, corrosion, and irritation, ensuring a safe and enjoyable swimming experience throughout the season.
Pool Maintenance and Care
Consistent upkeep is essential for a sparkling clean and safe Intex pool; regular cleaning, filter maintenance, and water chemistry adjustments are key.
Utilize the Intex Deluxe Maintenance Kit for efficient debris removal and water sanitation, prolonging the life of your pool and accessories.
Regular Cleaning Procedures
Maintaining a clean Intex pool involves consistent effort to remove debris and prevent algae growth. Daily skimming of the water surface is crucial, utilizing a leaf skimmer to collect leaves, insects, and other floating particles before they sink.

Vacuuming the pool floor should be performed at least once a week, or more frequently if needed, to remove settled dirt and sediment. An Intex manual vacuum or an automatic pool cleaner can be employed for this task. Pay close attention to corners and areas with reduced circulation.
Brush the pool walls and floor regularly – ideally twice a week – to dislodge algae and prevent its buildup. A pool brush designed for your liner type (vinyl or fiberglass) is recommended. Don’t forget to clean around fittings, ladders, and steps.
Empty the skimmer basket frequently, as a full basket restricts water flow and reduces the efficiency of the filtration system. Also, regularly clean the pump strainer basket to ensure optimal pump performance. Consistent cleaning contributes to crystal-clear water and a healthier swimming environment.
Filter Maintenance and Replacement
Regular filter maintenance is paramount for efficient pool operation and water clarity. Backwashing, if your filter type allows, removes accumulated debris and restores flow rate. Follow the Intex manual’s specific instructions for your filter model regarding backwashing frequency and procedure.
Cartridge filters require periodic cleaning. Remove the cartridge and rinse thoroughly with a garden hose, using a nozzle to dislodge trapped particles. Avoid using harsh chemicals or high-pressure sprays, which can damage the filter media. Inspect the cartridge for tears or damage and replace if necessary.
Sand filters necessitate occasional sand replacement, typically every 3-5 years, depending on usage. Monitor the filter pressure; a consistently high reading indicates clogged sand. Replace the sand according to the Intex manual’s guidelines.
Proper filter maintenance extends the lifespan of your equipment and ensures optimal water filtration, contributing to a cleaner, safer, and more enjoyable swimming experience. Ignoring filter upkeep leads to reduced efficiency and potential system failure.
Water Chemistry Monitoring and Adjustment
Maintaining proper water chemistry is crucial for swimmer comfort, equipment protection, and preventing algae growth. Regularly test your pool water using a reliable test kit or strips, checking pH, alkalinity, calcium hardness, and sanitizer levels.
pH levels should be maintained between 7.2 and 7.8. Low pH can cause corrosion, while high pH reduces sanitizer effectiveness. Adjust pH using pH increaser or decreaser, following product instructions carefully.
Total alkalinity acts as a pH buffer. Ideal levels are between 80 and 120 ppm. Adjust alkalinity before pH for stable water chemistry. Calcium hardness should be between 200 and 400 ppm to protect pool surfaces.
Sanitizer, typically chlorine, eliminates bacteria and algae. Maintain appropriate chlorine levels (1-3 ppm) using chlorine tablets, liquid chlorine, or a salt chlorine generator. Consistent monitoring and adjustment are key to a healthy pool.
Intex Deluxe Maintenance Kit Setup
The Intex Deluxe Maintenance Kit (models 2008-2011) provides essential tools for pool upkeep. Begin by connecting the telescopic pole sections, ensuring a secure lock for each joint. Attach the leaf skimmer to the pole; this removes surface debris like leaves and insects, preventing filter clogging.
Next, connect the vacuum head to the vacuum hose. The hose then connects to the hand-held brush, allowing for manual cleaning of pool walls and floor. Ensure all connections are tight to maintain suction.
The kit also includes a chemical floater for dispensing chlorine tablets or other sanitizers. Fill the floater with the appropriate chemicals and adjust the opening to control the release rate. Regularly inspect and refill the floater as needed.
Proper storage of the kit components when not in use will prolong their lifespan. Rinse all parts with fresh water after each use and store them in a dry, shaded area.

Troubleshooting Common Issues
Addressing leaks, cloudy water, and pump/filter problems are crucial for maintaining a healthy pool. Promptly identify and resolve these issues for optimal enjoyment.
Refer to your manual for specific solutions tailored to your Intex pool model and its components.
Dealing with Leaks
Identifying the source of a leak is the first critical step. Carefully inspect all connections – hoses, fittings, the filter pump, and around the pool liner itself. Small leaks often occur at connection points, so tighten clamps and ensure proper alignment.
For liner leaks, a patching kit specifically designed for vinyl pool liners is essential. Clean and dry the area thoroughly before applying the adhesive and patch, following the kit’s instructions precisely. Larger tears may require professional repair.
If the leak persists, systematically deflate the pool to pinpoint the exact location. Remember to check the drain plug and any return inlets. Consistent monitoring and prompt attention to leaks prevent significant water loss and potential damage to the pool structure. Always consult your Intex pool manual for model-specific guidance.
Never operate the pump with a known leak, as this can exacerbate the problem and potentially cause electrical hazards.
Addressing Cloudy Water
Cloudy water is often caused by imbalances in water chemistry, inadequate filtration, or the presence of organic debris. Begin by testing the water’s pH, alkalinity, and sanitizer levels using a reliable test kit. Adjust these levels according to the recommendations in your Intex pool manual.
Shocking the pool with a non-chlorine shock treatment can help eliminate contaminants and restore water clarity. Ensure proper circulation during and after shocking. Regularly backwash or clean your filter to remove accumulated debris and maintain optimal filtration efficiency.
Consider using a clarifier to bind together small particles, making them easier for the filter to remove. Algaecide can address algal blooms contributing to cloudiness. Consistent water maintenance and proactive chemical adjustments are key to preventing cloudy water.
Avoid overcrowding and ensure swimmers shower before entering the pool to minimize the introduction of contaminants.
Pump and Filter Problems
If your Intex pool pump isn’t running, first check the power supply and ensure it’s properly connected. Inspect the filter for clogs – a dirty filter significantly reduces pump performance. A tripped circuit breaker is another common cause; reset it if necessary.
Low water levels can prevent the pump from priming, so ensure sufficient water coverage. If the pump runs but has weak suction, backwash the filter or clean the filter cartridge. Air leaks in the plumbing can also cause issues; tighten all connections.
For filter problems, regularly inspect and clean or replace the filter cartridge as recommended in your manual. A damaged filter requires replacement; Consult the Intex troubleshooting guide for specific error codes or issues.
Always disconnect the pump before performing any maintenance or inspection.
Winterizing Your Intex Pool
Proper winterization protects your Intex pool from freezing damage. Thoroughly drain, clean, and safeguard the frame and liner during colder months for longevity.
Draining and Cleaning the Pool
Before winter storage, completely draining your Intex pool is paramount. Utilize the pool’s drain plug or a submersible pump to remove all water, ensuring no residual liquid remains within the liner or components.

Once drained, meticulously clean the pool’s interior surfaces. Remove any debris, leaves, or sediment that accumulated during the swimming season. A soft brush and mild detergent are recommended to avoid damaging the liner. Rinse thoroughly to eliminate any cleaning residue.
Pay close attention to the pool walls and bottom, scrubbing away any algae or staining. Inspect the liner for any tears or punctures and address them with a repair kit before storage. A clean pool prevents algae growth and extends the liner’s lifespan during the off-season.
Protecting the Pool Frame and Liner
After draining and cleaning, safeguarding the pool frame and liner is crucial for longevity. Disassemble the pool frame components, carefully cleaning each piece to remove dirt and grime. Store the frame parts in a dry, sheltered location, protected from the elements and potential damage.
The pool liner requires special attention. Thoroughly dry the liner before folding it loosely to prevent mildew and cracking. Store the liner in a cool, dark, and dry place, away from direct sunlight and extreme temperatures. Consider using a liner protectant spray for added preservation.
Proper storage prevents deterioration and ensures your Intex pool is ready for another season of enjoyment. Protecting these key components minimizes the need for costly repairs or replacements in the future.

Safety Barriers and Access Control
Install a robust safety barrier to eliminate unsupervised access for children and pets, securing all doors and windows around the pool area effectively.
Unauthorized entry prevention is paramount for a safe swimming environment.
Installing a Safety Barrier
Prioritizing safety necessitates a properly installed barrier around your Intex pool, preventing unsupervised access, particularly for young children and pets. This barrier should meet or exceed local regulations and building codes, ensuring maximum protection. Consider a self-closing, self-latching gate, positioned to control entry points effectively.
The barrier’s height should be sufficient to deter climbing, typically at least four feet, and constructed from durable materials resistant to weathering. Regularly inspect the barrier for any damage or weaknesses, promptly addressing any issues to maintain its integrity.
Ensure the barrier completely surrounds the pool area, isolating it from the house and yard. Gaps beneath the barrier should be minimal, preventing children from crawling underneath. A well-maintained safety barrier is a crucial investment in preventing accidents and ensuring peace of mind.
Securing Doors and Windows
Complementing the safety barrier, securing doors and windows leading to the pool area is paramount. All doors providing access should be equipped with self-closing and self-latching mechanisms, preventing accidental openings. Latches should be positioned high enough to be out of reach for small children, ensuring they cannot independently open them.
Windows overlooking the pool must also be secured, ideally with locking devices or limiting mechanisms that prevent full opening. Regularly inspect these mechanisms to confirm they are functioning correctly and haven’t been compromised.
Consider installing alarms on doors and windows that provide an audible alert if opened, providing an extra layer of protection. Maintaining vigilant oversight of access points is crucial for preventing unsupervised entry and ensuring a safe pool environment for everyone.