colorbond wall cladding installation guide
Navigating a Colorbond wall cladding installation demands careful planning and execution for a durable, aesthetically pleasing result․ This comprehensive guide,
drawing from resources like ClickSteel, details essential steps․ Proper substrate preparation, accurate measurements, and secure fixing techniques are paramount for success․
Understanding the nuances of overlapping sheets, flashing, and weathering details will ensure long-term protection against the elements․ Always prioritize safety and consider professional assistance if needed․
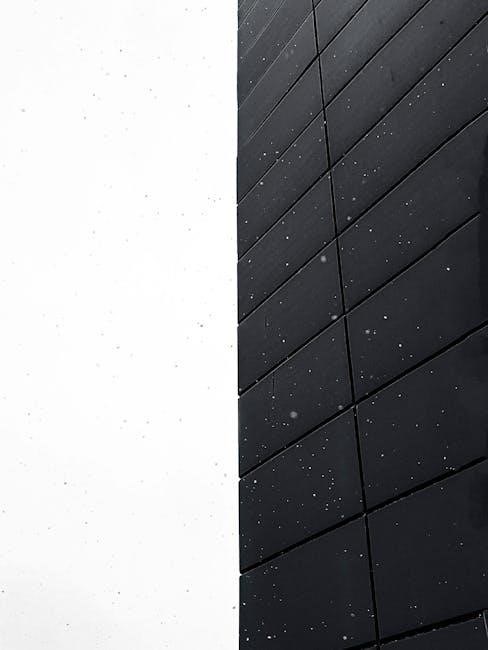
Colorbond cladding represents a popular and robust choice for modern building exteriors, offering a blend of aesthetic appeal and long-term durability․ Manufactured by BlueScope Steel, Colorbond steel is renowned for its resistance to harsh Australian conditions – including corrosion, fading, and chipping․ This makes it an ideal material for both residential and commercial projects seeking a low-maintenance, visually striking facade․
Essentially, Colorbond cladding involves fixing pre-painted steel sheets to a building’s framework․ The system provides a clean, contemporary look and is available in a wide spectrum of colours, allowing for design flexibility․ Installation typically involves overlapping sheets and secure fixing to battens, creating a weather-tight barrier․ Resources like ClickSteel highlight the importance of understanding the system before commencing work․
This guide aims to provide a comprehensive overview of the Colorbond cladding installation process, covering everything from initial preparation to final finishing touches․ Whether you’re a seasoned DIY enthusiast or a building professional, this information will equip you with the knowledge to achieve a high-quality, lasting result․ Careful attention to detail and adherence to best practices are crucial for a successful installation․
Benefits of Colorbond Steel Cladding
Colorbond steel cladding offers a multitude of advantages, making it a preferred choice for building professionals and homeowners alike․ Its inherent durability is a key benefit; the material is engineered to withstand Australia’s challenging climate, resisting corrosion from salt spray, harsh UV radiation, and extreme temperatures․ This longevity translates to reduced maintenance costs over the building’s lifespan․
Aesthetically, Colorbond provides a modern and clean appearance, available in a diverse palette of colours to complement any architectural style․ The pre-painted finish ensures colour retention, minimizing the need for repainting․ Furthermore, Colorbond is a lightweight material, reducing structural load compared to heavier cladding options․
Beyond aesthetics and durability, Colorbond is also environmentally responsible․ It’s 100% recyclable, contributing to sustainable building practices․ Installation, while requiring skill, is relatively quick, potentially reducing project timelines․ Resources like ClickSteel emphasize the long-term value and performance benefits, making Colorbond a smart investment for any building project․
Tools and Materials Required for Installation
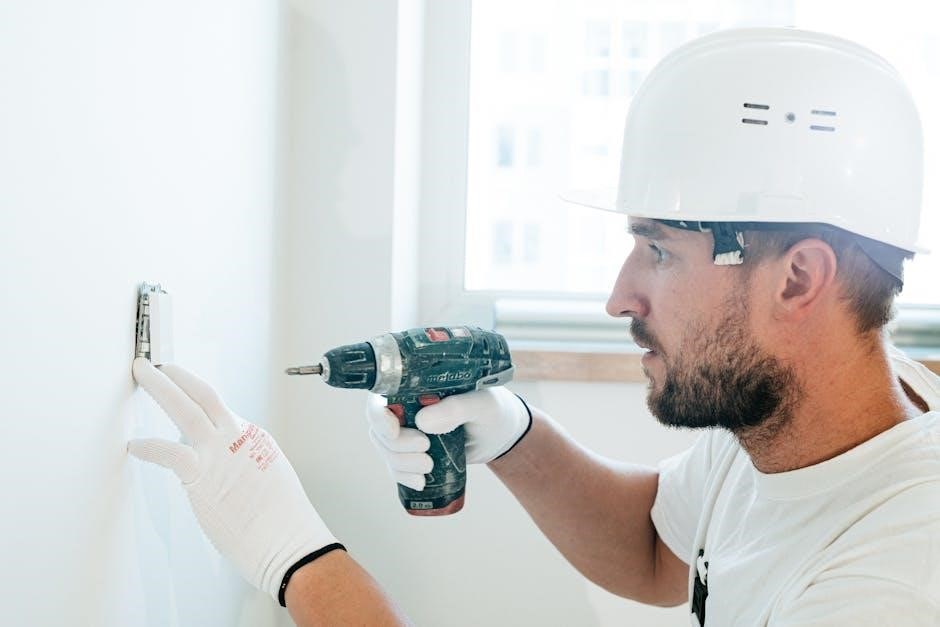
Successful Colorbond cladding installation necessitates a comprehensive collection of tools and materials․ Essential tools include a measuring tape, spirit level, chalk line, metal snips or a nibbler for precise cutting, and a power drill with appropriate drill bits for fixings․ A rivet gun may be required depending on the chosen fixing method․
Safety equipment is paramount: safety glasses, gloves, a hard hat, and appropriate footwear are non-negotiable․ Materials will encompass the Colorbond steel sheets themselves, timber or steel battens for framing, appropriate Colorbond fixings (screws, rivets, or nails), flashing for weatherproofing, and sealant․
Consider a metal folding tool for creating neat edges and corners․ A rubber mallet can assist with sheet alignment․ Depending on the substrate, you may need additional materials like timber preservative or concrete anchors․ Planning and having all materials readily available streamlines the installation process, minimizing delays and ensuring a professional finish․
Preparing the Substrate
Proper substrate preparation is foundational for a durable and aesthetically pleasing Colorbond cladding installation․ The substrate, whether timber, concrete, or steel, must be structurally sound, clean, dry, and level․ For timber substrates, ensure all timber is treated to resist rot and insect infestation, and that it meets relevant building codes․
Concrete surfaces should be free of loose particles, oil, or grease․ Repair any cracks or damage before proceeding․ Steel substrates require rust removal and a suitable primer to prevent corrosion․ Achieving a level surface is crucial; any irregularities will translate through the cladding․
Verify the substrate is adequately braced to support the weight of the Colorbond sheets and withstand wind loads․ Ensure proper ventilation behind the cladding to prevent moisture buildup․ A well-prepared substrate guarantees optimal adhesion and longevity of the installed cladding system, preventing future issues․
Framing and Battens Installation
Robust framing and correctly installed battens are critical for supporting Colorbond cladding and ensuring its long-term performance․ The framing must comply with local building codes and be designed to withstand anticipated wind loads and other environmental factors․ Timber frames should be treated for durability and resistance to moisture and pests․
Battens, typically timber or steel, provide a fixing point for the Colorbond sheets and create a cavity for ventilation․ Vertical battens are generally installed at 600mm centers, but this may vary depending on the cladding profile and wind zone requirements․ Ensure battens are straight, plumb, and securely fastened to the framing․
Proper batten spacing is essential to prevent sheet deflection and maintain a neat, uniform appearance․ Consider using a moisture barrier between the framing and the battens to further protect against water damage․ Accurate batten installation establishes a solid foundation for the cladding, contributing to its structural integrity and weather resistance․
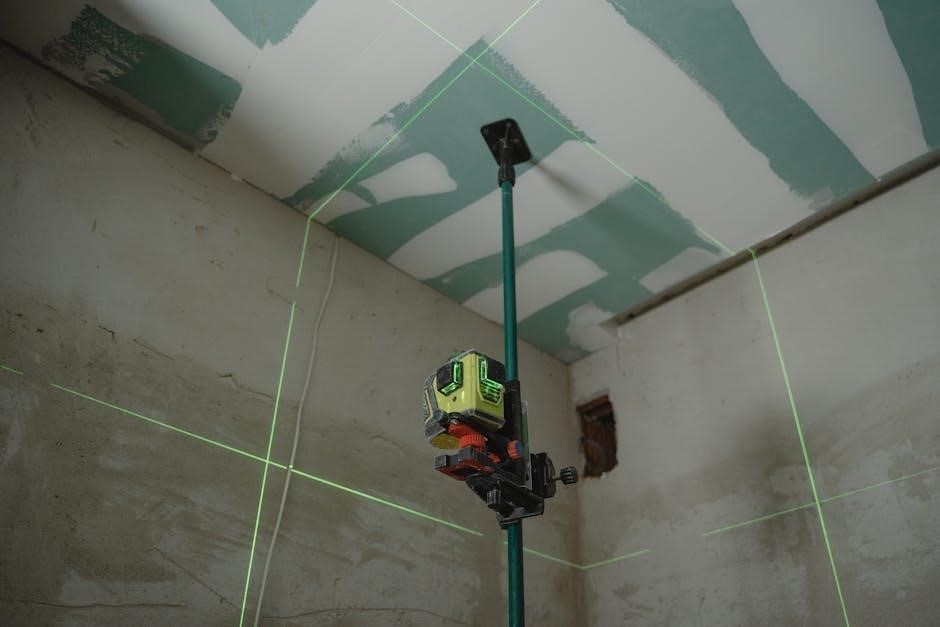
Measuring and Cutting Colorbond Sheets
Accurate measurement and precise cutting are fundamental to a professional-looking Colorbond cladding installation․ Begin by carefully measuring the wall area to be clad, accounting for openings like windows and doors․ Transfer these measurements onto the Colorbond sheets, allowing for overlaps as specified by the manufacturer – typically one full corrugation or rib․
Use a metal-cutting blade in a circular saw or specialized shears designed for Colorbond steel․ Avoid using abrasive blades, as they can create excessive heat and damage the protective coating․ Always wear safety glasses and gloves when cutting․ Score the sheet first for a cleaner cut, and support the sheet adequately to prevent bending or distortion․
Double-check all measurements before cutting, and remember that it’s better to cut slightly larger than needed, allowing for minor adjustments․ Deburr the cut edges with a file to remove any sharp points and ensure safe handling․ Precise cutting minimizes waste and ensures a snug, weather-tight fit․
Installing the First Row of Cladding
The first row of Colorbond cladding is arguably the most critical, establishing the level and alignment for all subsequent rows․ Begin at the lowest point of the wall, ensuring a perfectly level starting line․ Use a spirit level and chalk line to mark this reference point accurately․
Position the first sheet, aligning it with the level line and ensuring the desired overhang at the corners․ Pre-drill holes through the sheet and into the substrate or framing, slightly larger than the fixing screws to allow for thermal expansion․
Secure the sheet using appropriate Colorbond fixings, ensuring they are driven in straight and to the correct depth – not too tight, which can damage the sheet, and not too loose, which compromises security․ Check for plumbness frequently during installation․ This initial row dictates the success of the entire cladding project, so meticulous attention to detail is essential․
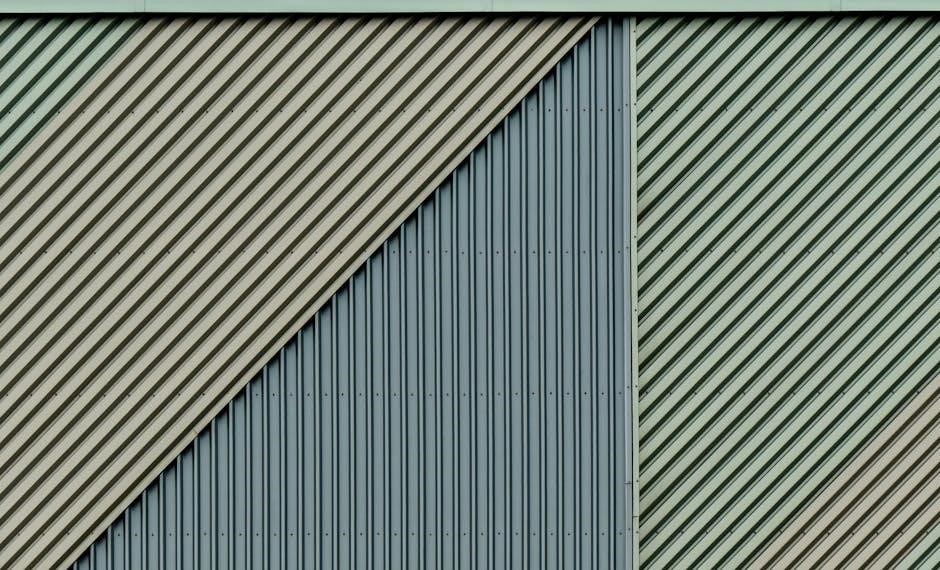
Overlapping and Fixing Colorbond Sheets
Proper overlapping of Colorbond sheets is crucial for weatherproofing and structural integrity․ Typically, a minimum overlap of one corrugation (or the manufacturer’s recommendation for other profiles) is required․ This prevents water ingress and provides a secure connection between sheets․
When fixing, always use Colorbond-specific screws with neoprene washers to prevent corrosion and allow for thermal movement․ Fixings should be installed into the framing or battens, not directly into the substrate․ Stagger the fixings to distribute the load evenly and avoid concentrated stress points․
Ensure fixings are driven in straight and to the correct depth, creating a watertight seal with the neoprene washer․ Avoid over-tightening, which can distort the sheet․ Regularly check alignment as you progress, maintaining a consistent overlap and fixing pattern․ This meticulous approach guarantees a durable and weather-resistant cladding system․
Using Colorbond Cladding Fixings
Selecting the correct fixings is paramount for a secure and long-lasting Colorbond cladding installation․ Standard screws are insufficient; always utilize fixings specifically designed for Colorbond steel, featuring a corrosion-resistant coating to match the cladding’s finish․
Crucially, these fixings must incorporate neoprene washers․ These washers create a watertight seal, preventing water penetration around the screw hole, and accommodate the natural expansion and contraction of the steel due to temperature fluctuations․ The washer cushions the steel, preventing damage․
Fixing length is also critical․ The screw must penetrate sufficiently into the supporting structure (framing or battens) – typically at least 20mm – to ensure a strong hold․ Avoid over-tightening, which can crush the neoprene washer and compromise the seal․ Proper fixing technique, combined with quality Colorbond fixings, guarantees a robust and weather-resistant cladding system․
Flashing and Weatherproofing Details
Effective flashing and weatherproofing are non-negotiable for a durable Colorbond cladding installation; Flashing directs water away from vulnerable areas, preventing moisture ingress and potential structural damage․ Pay particular attention to junctions – where the cladding meets roofs, windows, doors, and other walls․
Use appropriate flashing materials compatible with Colorbond steel, such as galvanized steel or aluminum, ensuring they are properly sealed with a high-quality, flexible sealant․ Overlap flashing correctly, following manufacturer’s recommendations, to create a continuous barrier against water penetration․
Consider using weep holes at the base of cladding to allow any accumulated moisture to escape․ Sealant application should be precise and consistent, filling all gaps and crevices․ Proper detailing around penetrations, like pipes or vents, is also vital․ A well-executed weatherproofing strategy safeguards your investment and ensures long-term performance․
Cutting Around Openings (Windows & Doors)
Precise cutting around windows and doors is crucial for a professional-looking Colorbond cladding installation․ Accurate measurements are paramount; carefully measure the opening, accounting for any reveals or trims; Transfer these measurements onto the Colorbond sheet, ensuring a snug fit, but allowing a slight tolerance for adjustments․
Utilize appropriate cutting tools – a nibbler, aviation snips, or a circular saw with a metal-cutting blade are commonly used․ When using power tools, prioritize safety and wear appropriate personal protective equipment․ Cut slightly outside the marked line initially, then refine the cut for a precise fit․
Deburr all cut edges to prevent sharp points and ensure safe handling․ Pay attention to the direction of the Colorbond’s corrugation or profile when making cuts․ Proper preparation and careful execution will result in clean, seamless integration of windows and doors within the cladding․
Corner and Edge Trimming
Achieving neat and durable corner and edge finishes is vital for a polished Colorbond cladding installation․ External corners require particular attention to prevent water ingress and maintain structural integrity․ Utilize corner flashings specifically designed for Colorbond, ensuring they overlap the cladding sheets correctly․
Internal corners can be addressed with corner trims or by carefully mitering the Colorbond sheets․ Accurate measurements and precise cuts are essential for a seamless appearance․ Edge trimming involves neatly finishing exposed edges of the cladding, preventing sharp edges and potential corrosion․
Employ appropriate metal-cutting tools, such as nibblers or aviation snips, for clean and controlled trimming․ Deburr all cut edges thoroughly․ Consider using edge sealing compounds to further protect against the elements and enhance the longevity of the installation․ Proper corner and edge detailing significantly contributes to the overall aesthetic and weather resistance of the cladding․
Dealing with Waste and Offcuts
Efficiently managing waste and offcuts is crucial for cost-effectiveness and environmental responsibility during a Colorbond cladding project․ Careful planning of sheet layouts minimizes waste generation from the outset․ Prioritize maximizing the use of full sheets whenever possible, strategically positioning cuts to reduce scrap․
Smaller offcuts can often be repurposed for flashings, trims, or other smaller components of the installation․ Store offcuts carefully to prevent damage or corrosion․ Consider recycling options for any unusable scrap metal; many metal recyclers will accept Colorbond offcuts․

Dispose of any remaining waste responsibly, adhering to local regulations for metal waste disposal․ Proper handling of cutting debris is also important – use appropriate containers and avoid leaving sharp edges exposed․ Minimizing waste not only saves money but also demonstrates a commitment to sustainable building practices․
Colorbond Cladding Maintenance
Maintaining Colorbond cladding ensures its longevity and preserves its aesthetic appeal․ Regular cleaning is key; typically, rainwater is sufficient, but periodic washing with mild detergent and water can remove accumulated dirt and grime․ Avoid abrasive cleaners or high-pressure washers, as these can damage the protective coating․

Inspect the cladding annually for any signs of damage, such as scratches, dents, or corrosion․ Address any issues promptly to prevent further deterioration․ Small scratches can often be touched up with Colorbond-compatible paint․ Check fixings to ensure they remain secure and haven’t corroded․
Pay particular attention to coastal areas, where salt spray can accelerate corrosion․ Regular rinsing with fresh water can mitigate this effect․ Proper maintenance extends the lifespan of your Colorbond cladding, protecting your investment and maintaining the building’s appearance for years to come․
Safety Precautions During Installation
Colorbond cladding installation demands strict adherence to safety protocols․ Always wear appropriate Personal Protective Equipment (PPE), including safety glasses, gloves, a hard hat, and sturdy, closed-toe footwear․ When working at heights, utilize a secure scaffolding system or harness with appropriate fall arrest equipment – never work without proper fall protection․
Colorbond sheets have sharp edges; handle them with care to avoid cuts․ Use appropriate lifting techniques to prevent strains and injuries when moving sheets․ Be mindful of weather conditions; avoid installation during high winds or inclement weather․ Ensure the work area is clear of obstructions and debris to prevent trips and falls․
When using power tools, follow manufacturer’s instructions and wear hearing protection․ Be aware of overhead power lines and maintain a safe distance․ Proper planning and a commitment to safety are crucial for a successful and injury-free installation․
Common Installation Mistakes to Avoid
Avoiding common pitfalls is crucial for a successful Colorbond cladding project․ A frequent error is inadequate substrate preparation – ensure the surface is level, clean, and structurally sound before commencing․ Incorrectly measuring and cutting sheets leads to wasted material and unsightly gaps; double-check all measurements before cutting․
Insufficient overlapping of sheets compromises weatherproofing, potentially causing leaks and corrosion․ Using incorrect fixings can damage the cladding and reduce its lifespan; always use fixings specifically designed for Colorbond․ Over-tightening fixings can also cause issues, leading to distortion or damage․
Neglecting flashing details around windows, doors, and roof junctions is a common mistake, resulting in water ingress․ Failing to account for thermal expansion and contraction can cause buckling․ Careful attention to detail and adherence to best practices will prevent these issues․
Finding a Professional Installer
Selecting a qualified installer is vital if you lack the experience or confidence for a DIY Colorbond cladding project․ Begin by seeking recommendations from friends, family, or online reviews․ Verify the installer’s licensing and insurance to ensure they meet local regulations and provide adequate protection․
Request quotes from multiple installers, detailing the scope of work, materials included, and estimated timelines․ A reputable installer will provide a comprehensive quote and be willing to answer your questions thoroughly․ Check their portfolio or ask for references from previous clients to assess the quality of their workmanship․
Ensure the installer has specific experience with Colorbond steel cladding and understands proper installation techniques․ Discuss warranty details and after-sales support․ A professional installer will guarantee their work and address any issues that may arise post-installation, providing peace of mind and a lasting result․